You just aced your final job interview, and the hiring manager hands you a list of pre-employment requirements. Right at the top sits the National Bureau of Investigation (NBI) clearance. Alternatively, you might be preparing a massive stack of documents for your dream vacation or immigration visa. Either way, securing this crucial document stands between you and your next big life milestone.
Gone are the days when you had to line up outside a government office at four in the morning just to get a spot. The government has completely digitized the registration process, allowing you to secure your slot from the comfort of your own home. However, navigating government portals can sometimes feel overwhelming if you do not know exactly what to do.
In this guide, you will learn the exact steps to schedule your NBI appointment online. We will walk you through creating an account, filling out the application form, choosing your branch, and paying the required fees. We will also cover exactly what you need to bring on your appointment day and how to avoid the most common delays.
Why Do You Need an NBI Clearance?
An NBI clearance serves as an official government document certifying that you do not have any criminal record in the Philippines. It verifies your identity and background, giving institutions peace of mind when dealing with you.
Secure Your Employment
Almost every employer in the country requires a valid NBI clearance before you sign a job contract. Companies want to ensure they hire trustworthy individuals with clean legal backgrounds. This applies to everyone from entry-level administrative staff to executive directors. Without this document, human resources cannot officially process your hiring packet.
Process Travel and Immigration Visas
If you plan to work abroad, study overseas, or apply for permanent residency in another country, foreign embassies will ask for this document. Immigration officers use it to verify that you are not fleeing any pending legal cases. A valid, multi-purpose NBI clearance ensures your visa application moves forward without unnecessary legal roadblocks.
Establish a Valid Proof of Identity
Because the NBI conducts a thorough background check and captures your biometric data, the clearance acts as a strong secondary proof of identity. Many banks, government agencies, and legal offices accept it when you need to open an account, apply for a loan, or process property documents.
Step-by-Step Guide to Booking Your NBI Appointment Online
The official NBI Clearance portal handles all applications and renewals. You need a stable internet connection and a valid email address to begin the process.
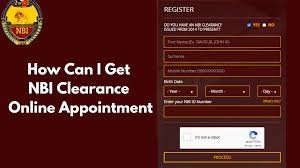
Step 1: Register on the Official NBI Clearance Website
Open your preferred web browser and navigate to the official NBI Clearance website. If this is your first time securing a clearance, look for the “Register” box on the right side of the screen. Check the box indicating you are a first-time applicant.
Fill in your basic details, including your full name, gender, civil status, and birth date. You must provide a working email address and a mobile number. The system will send a One-Time Password (OTP) to your phone or email to verify your identity. Input the OTP to successfully activate your account.
Step 2: Fill Out Your Application Form
Once you log into your new account, the system prompts you to complete your “Applicant Information” page. This serves as your official application form.
Take your time here. You need to provide your exact address, your parents’ names, their birthplaces, and your educational background. Type everything carefully. A single misspelled name or incorrect birth date can cause major issues during the printing phase. Once you fill in every required field, click the “Save Information” button at the bottom of the screen. Click on “Apply for Clearance” to move to the next phase.
Step 3: Select Your Appointment Date and Location
After saving your information, the system will ask you what type of ID you will bring to your appointment. Select your preferred valid ID from the dropdown menu and type in the ID number. Click “Agree” on the terms and conditions.
A calendar screen will appear. First, use the dropdown menu at the top to select your preferred NBI branch. Choose a location closest to your home or workplace for convenience. Once you select a branch, the calendar will populate with available slots.
Blue boxes indicate open slots, while red boxes mean the branch is fully booked for that shift. Click on your preferred date and choose between the AM (morning) or PM (afternoon) shift.
How to Pay the NBI Clearance Fee
You cannot secure your appointment slot without paying the clearance fee first. The standard multi-purpose NBI clearance usually costs PHP 130, plus an additional PHP 25 to PHP 30 electronic payment system fee. The website provides several convenient payment channels.
Available Payment Options
When you finalize your schedule, a payment options box appears on the right side of the screen. You can choose from the following methods:
- Bank Over the Counter: You can visit major banks like BDO, BPI, or Metrobank to pay your fee in cash.
- Online Banking: If you have a banking app, you can transfer the payment directly through the portal.
- E-Wallets: GCash and Maya offer the fastest payment methods. Simply select the e-wallet option, scan the QR code or log into your account, and authorize the deduction.
- Bayad Centers: You can pay at any 7-Eleven, LBC, or designated Bayad Center nationwide.
Once you select a payment method, the system generates a unique Reference Number. Take a screenshot or write this number down immediately. You will use this number to process your payment. After you pay, return to the NBI portal and check the “Transactions” tab to ensure your payment reflects as “Paid.”
What to Bring on Your NBI Appointment Day
Showing up to your appointment unprepared will result in you being sent home. The NBI strictly enforces their documentation rules. Gather these items the night before your scheduled date.
Two Valid Government IDs
You must present at least two original, valid government-issued primary IDs. These IDs must perfectly match the details you encoded on your online application form. Acceptable IDs include your Philippine Passport, UMID card, PhilSys ID (National ID), Driver’s License, Postal ID, or PRC ID. Company IDs and barangay clearances generally do not count as primary identification.
Your Official Reference Number
You do not strictly need to print out the entire application form, but you must bring your Reference Number. You can show the digital screenshot on your phone to the NBI officer. They will input this number into their system to pull up your paid application, take your digital photo, and scan your fingerprints.
Proper Attire
The NBI strictly enforces a dress code inside their facilities. Treat this like a professional appointment. Do not wear tank tops, sleeveless shirts, shorts, or flip-flops. Wear closed-toe shoes and decent casual or business attire. Since they will take your photo for the official document, you want to look presentable anyway.
Tips to Avoid Common NBI Appointment Mistakes
Even with a scheduled appointment, some applicants experience delays. Keep these tips in mind to ensure a smooth, stress-free process.
First, arrive on time for your specific shift. If you booked the AM shift, do not show up at 3:00 PM expecting them to accommodate you. The branches limit the number of applicants per shift to prevent overcrowding.
Second, double-check your encoded data before paying. If you misspell your own name on the online form and pay the fee, the NBI officers cannot edit that specific field on-site. You will have to create a new application and pay the fee all over again.
Finally, prepare for a possible “Hit.” If you share a name with someone who has a pending criminal case, the NBI system will flag your application as a “Hit.” Do not panic. This is completely normal for people with common names. The officer will simply ask you to return after a few days so they can manually verify that you are not the person with the criminal record.
Secure Your Clearance Today
Getting your NBI clearance no longer requires a grueling wait outside a government building before dawn. The online appointment system puts you in complete control of your schedule.
By understanding how to register properly, double-checking your encoded details, and choosing the most convenient payment method, you guarantee a seamless process. Remember to save your reference number, dress appropriately, and bring your valid IDs to the branch. Take ten minutes right now to visit the NBI Clearance portal, secure your slot, and check this crucial requirement off your to-do list!